Create a MYSQL User with all privileges
March 7th, 2021 by Chris TrinidadThis page is an extension of our post on creating a new MYSQL database. If this doesn’t match exactly with your CPanel admin area please feel free to contact us. We may be able to help you pretty quickly.
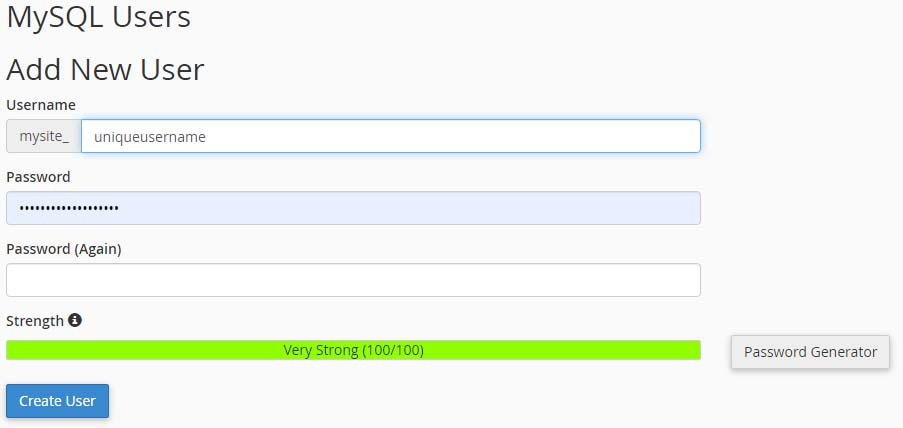
Step 1: After you’ve created your new database you should be presented with the option to create a new MYSQL user for that database.
For this example we’ve included the screenshots below from a fairly basic CPanel account. Something a great majority of you will have. This form is fairly straight forward. You’ll want to create a unique user name. We do implore you to create a strong password, very strong if possible. You won’t have to memorize it in most cases and you don’t want this to be an easy guess as it could present a vulnerability for your website. Especially if you’re using this for your WordPress installation.

Once you’ve submitted this form with a unique user name and strong password, please submit. As with the MYSQL database creation—GREEN is good.
![]()
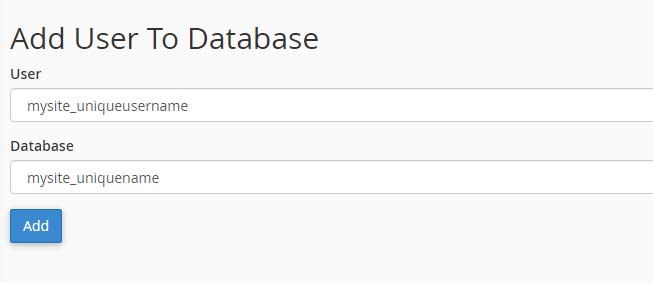
Step 2: Next step is to assign the user to the database and grant all privileges.
The good news, is you’re almost done. We just have to make sure that the database has a user associated with it. Since it’s new it really won’t know what to do or who to listen to. So let’s do that now. This is a general form where you select the user and database—by clicking add you’re creating the connection.

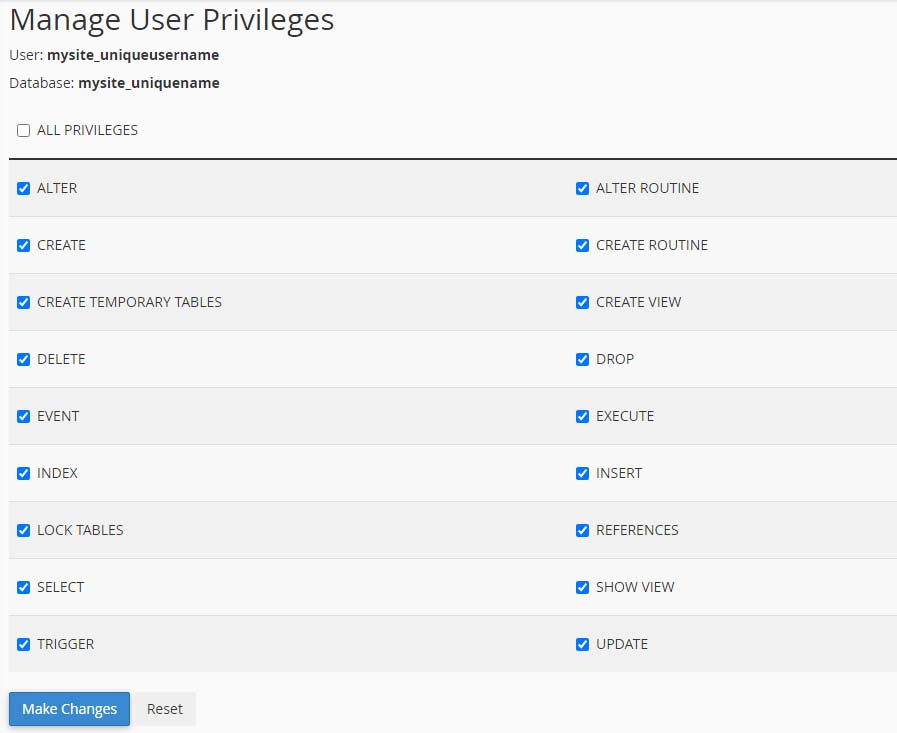
Once this form has been submitted you’ll be presented with an interesting form. What we’re here for is to ensure we create a user for a database with all privileges. So let’s do that now. Make sure the selected items match on your end.

Once again—GREEN is good.
You’re all set. You have functioning database with a user attached to it. That user has all privileges and can be used for any website that needs to communicate with a MYSQL database. That includes WordPress or custom coded development and MYSQL interactions.
Again, this post is associated with another post “creating a new MYSQL database“. If you need to return to step one of this process or start over feel free to do so. As always, if you have a question—we’re always here.

